This script syncs Salesforce Cases into Notion, allowing for easier sprint planning and providing visibility to users who may not have access to Salesforce. It requires a Python environment, the Python File package, Salesforce access, and a Notion account. The script also requires familiarity with setting up a Python environment and creating a Salesforce Connected App. With this script, users can save time and streamline their workflow by consolidating their work into one platform.
What you will need:
- Python Environment (local)
- The Python File package (GitHub Repo)
- Salesforce access
- Admin permission, or at least the permission set to create a Connected App)
- Service Console with Cases
- You can also create a Sandbox or a Hands-On Org if you want to try this without messing with your production Org.
- A Notion account
Setting up a Python Environment:
If you need to set up a Python environment for the first time, you can follow my guide on setting up Python and VSCode. There are also several excellent resources that you can use to help with this process. I recommend ChatGPT for any command line errors during the setup process.
Install the needed Modules into Visual Studio Code
You must add the following modules to your environment to run this code. If everything was installed correctly within VSCode, you should be able to run these code snippets as they are shown within your terminal:
pip install simple-salesforcepip install requestspip install pandasCreating the Salesforce API Connection:
For this script to work, you will need to authenticate with Salesforce. Here is what you will need from Salesforce:
YOUR_SALESFORCE_USERNAME: Your Salesforce username.

YOUR_SALESFORCE_PASSWORD: Your Salesforce password.

YOUR_SALESFORCE_SECURITY_TOKEN: Your Salesforce security token.

YOUR_SALESFORCE_CLIENT_ID: The client ID of your Salesforce Connected App.

YOUR_SALESFORCE_CLIENT_SECRET: The client secret of your Salesforce Connected App.
Your Username and Password are the same that you would use at login.salesforce.com, so I’ll move on to the Security Token.
Obtaining your Salesforce Security Token
In Salesforce, the security token is typically sent to you via email when you first set up your Salesforce account or when you reset your security token. If you need to obtain or reset your security token, you can follow these steps:
- Log in to Salesforce: Open your web browser and log in to your account.
- Access Your User Settings:
- Click on your profile picture in the upper-right corner.
- Select “Settings.”
- Navigate to the Reset My Security Token Page:
- Click “Reset My Security Token” in the left sidebar under “My Personal Information.”
- If you can’t find it, you can also use the quick find box at the top of the setup menu to search for “Reset My Security Token.”
- Reset Security Token:
- Click the “Reset Security Token” button.
- Salesforce will send you an email with the new security token.
- Check Your Email:
- Open the email from Salesforce.
- The email subject should be “Your new Salesforce security token.”
- Copy the Security Token:
- Copy the security token from the email.
Creating a Salesforce Connected App:
Finally, to obtain the ‘client_id’ and the ‘client_secret,’ you must create a Connected App in Salesforce. You may already have one that you use for API connections, but here are the instructions just in case:
- Log in to Salesforce: Open your web browser and log in to your account.
- Access Setup:
- Click on the gear icon in the upper-right corner.
- Select “Setup” from the dropdown menu.
- Navigate to App Manager:
- Type “App Manager” in the quick find box in the left sidebar.
- Click on “App Manager.”
- Create a New Connected App:
- Click the “New Connected App” button.
- Fill in the required information:
- Connected App Name: Choose a name for your app.
- API Name: This will be automatically generated based on the name.
- Contact Email: Your email address.
- Enable OAuth Settings: Check this box.
- Callback URL: Enter a valid URL (e.g.,
https://localhostIf you will only run this on your local machine) - Selected OAuth Scopes: Add at least “Access and manage your data (API)” and other scopes you need.
- Save the Connected App:
- Click “Save.”
- After saving, you will be taken to the details page for your Connected App.
- Retrieve
client_idandclient_secret:- On the details page, look for the “Consumer Key” (this is your
client_id) and “Consumer Secret” (this is yourclient_secret). - Click on the “Click to reveal” link next to the “Consumer Secret” to view and copy your
client_secret.
- On the details page, look for the “Consumer Key” (this is your
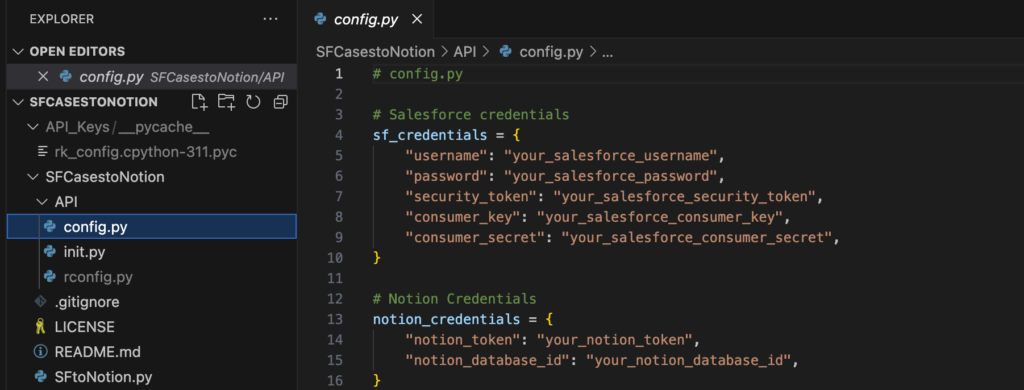
Once you have this information, add it to the config.py file within the cloned repo.

Creating a Notion API Connection:
Next, you need to use the Notion API to create the cards. The Notion API allows you to programmatically interact with Notion databases, pages, and other elements. Here are the general steps you can follow to create a Notion card:
- Set Up a Notion Connection:
- Go to the Notion Integrations page: https://www.notion.so/my-integrations
- Click on “Create a new integration” to create a new integration.
- After creating the integration, you’ll get an Integration Token. Save this token securely, as it will be used to authenticate your requests to the Notion API.
- Get Notion Database ID:
- Open your Notion workspace and navigate to the database where you want to create cards.
- Click on the “Share” button at the top-right of the database.
- Click on “Copy link” to copy the link to the database. The link will contain the database ID, which will be a 32-character string of numbers and letters
- Add those parameters to your config.py file

- Install Notion SDK:
- Install the
notion-sdk-pyLibrary a Python client for the Notion API. You can install it using:
- Install the
pip install notion-sdk-pyAuthorize the Integration to Run in your Notion Database
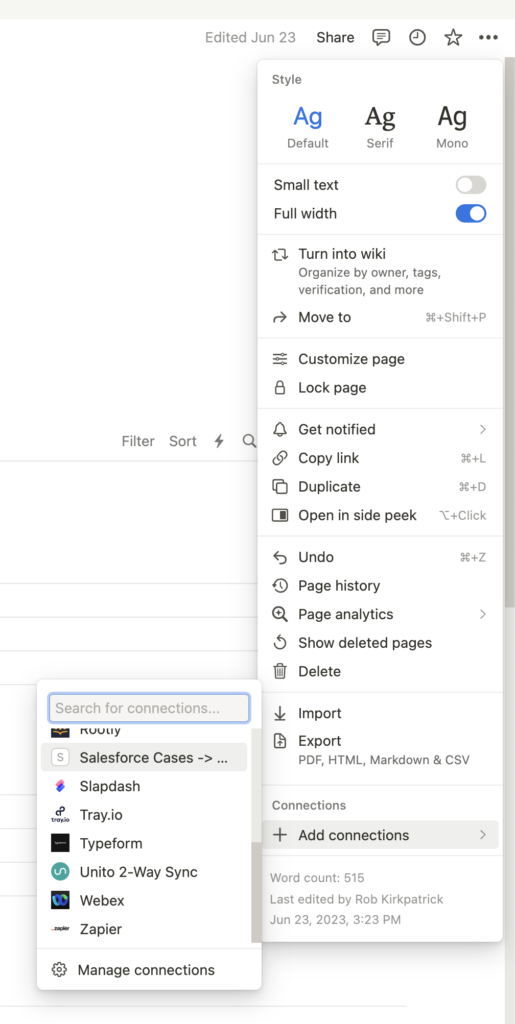
Even though you’ve created a database where you want the cards to be created, you need to allow the integration to run in Notion. You do that by:
- Going to your Notion page
- Clicking the …
- Click “+ Add Connections”
- Find the Connection you created above

Edit the SOQL Query in Salesforce
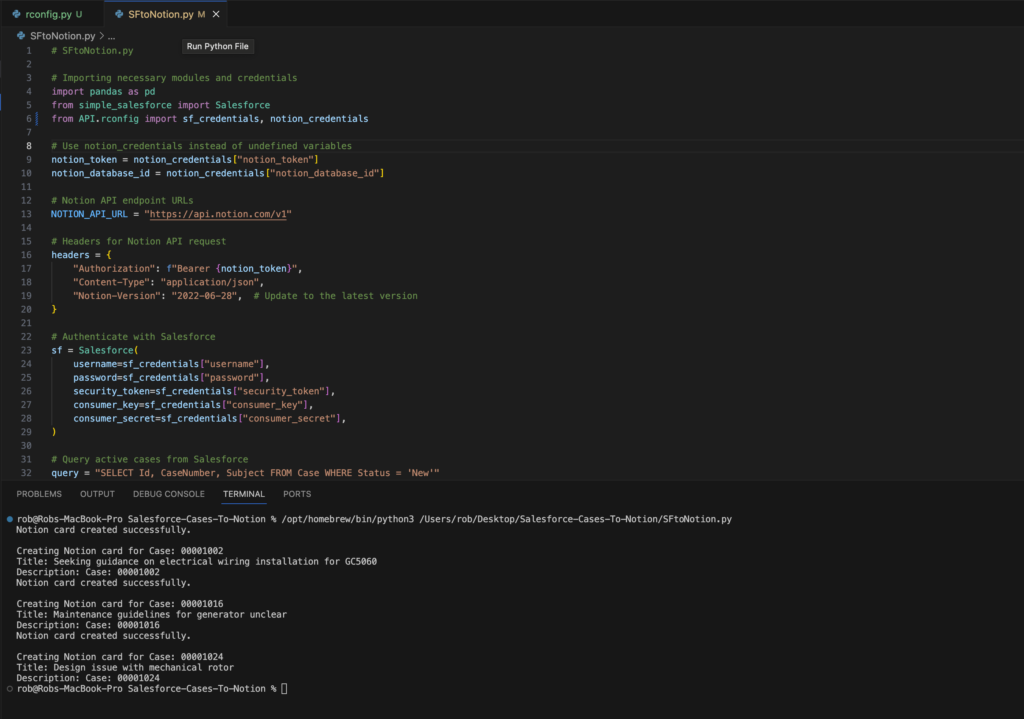
I have this code to pull only the Active Cases with their Description and Name. You may want to revise this code and change it if you need any more information (line 32)
query = "SELECT Id, CaseNumber, Subject FROM Case WHERE Status = 'New'"If you do add anything to the query, you’ll need to map it to the Notion card as well (lines 46-51)
"properties": {
            "title": [{"text": {"content": title}}],
            "Description": [{"text": {"content": description}}],
        },
    }
Running the Code
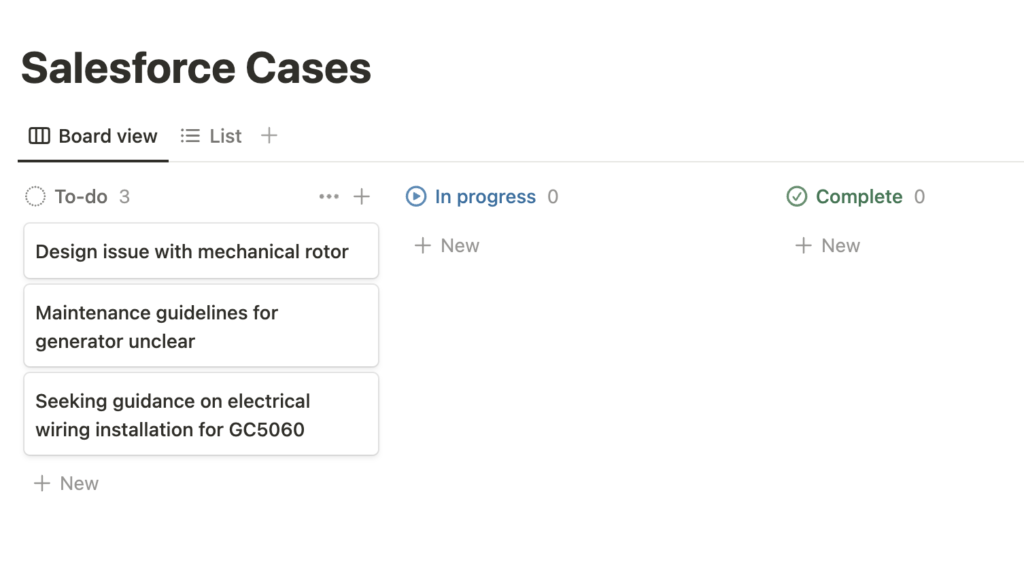
Once these steps are completed, you can click the ▶️ icon and run your code. You should see the Cases get created in the terminal window.

Running the code in VS Code

The Cases created in Notion
Wrap up
Now that the Cases are syncing into Notion, you should look to edit the SOQL Query so that the next time you run this code, it only returns cases that are newly created. You could do that by changing the query to add some time constraints like this:
"SELECT Id, CaseNumber, Subject FROM Case WHERE Status = 'New' AND CreatedDate >= TODAY"Let me know if you implement this code into your workflow and how you would improve it!
